How to Move Your Blog to Your Own Domain
Move your blog to your own domain that is registered with GoDaddy
Follow these steps to move your blog to your own domain if your domain is registered with GoDaddy:
Log in to your GoDaddy account here
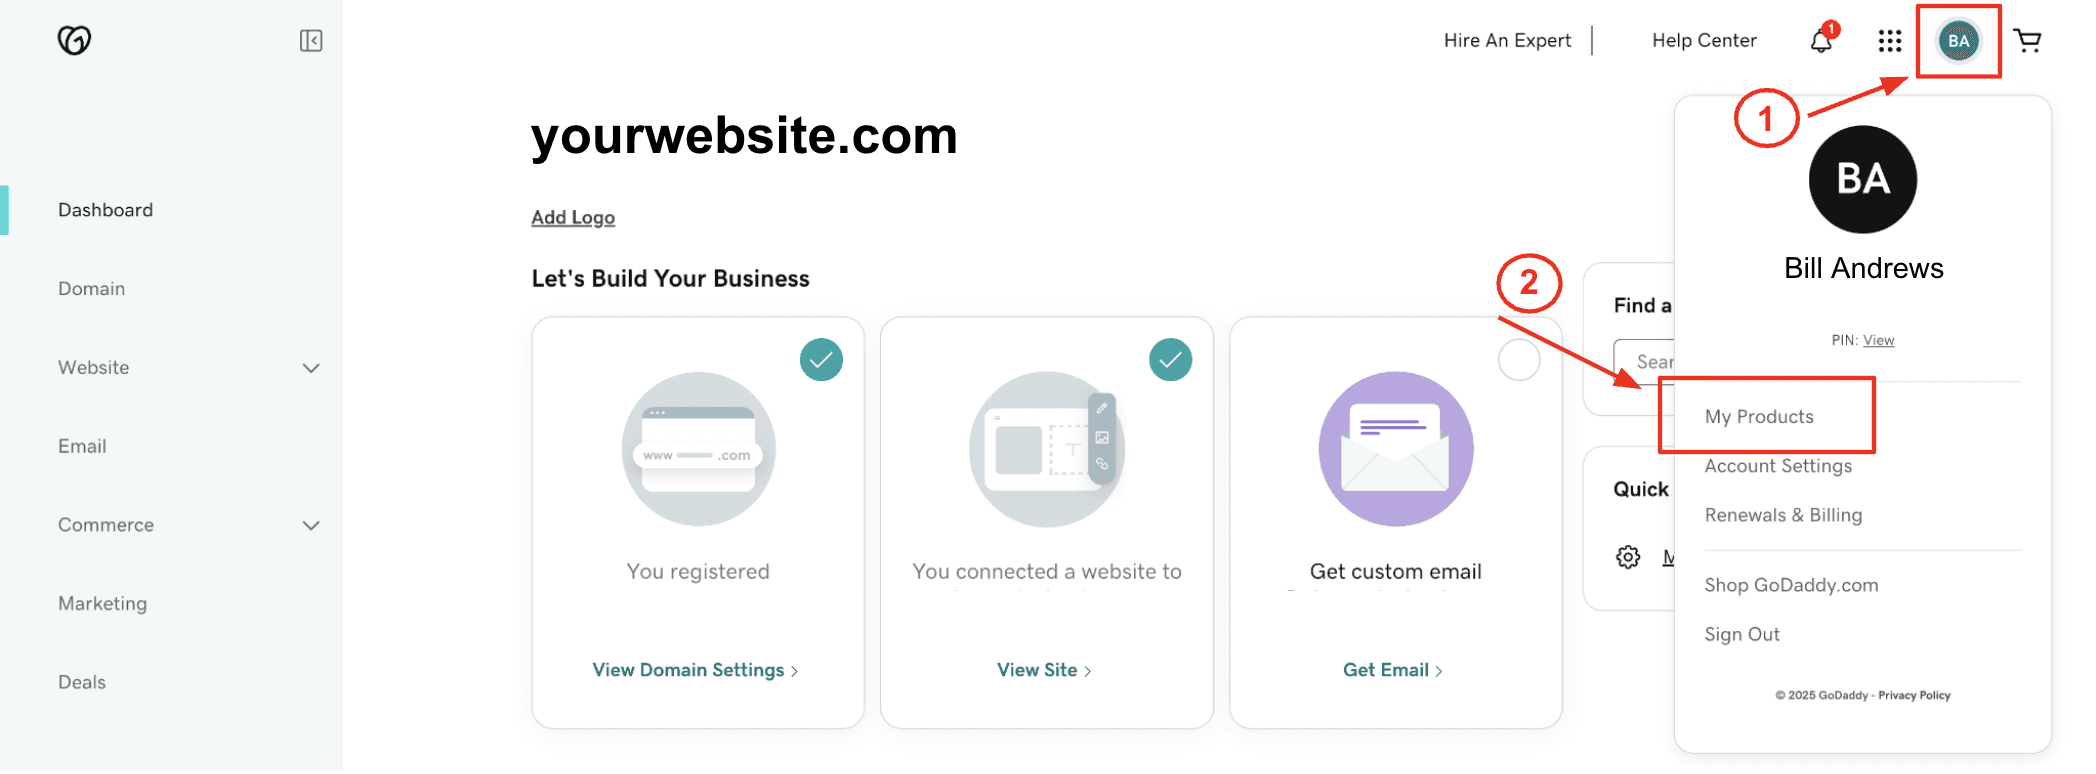
Once logged in, click the profile circle in the top right and select 'My Products' from the dropdown:
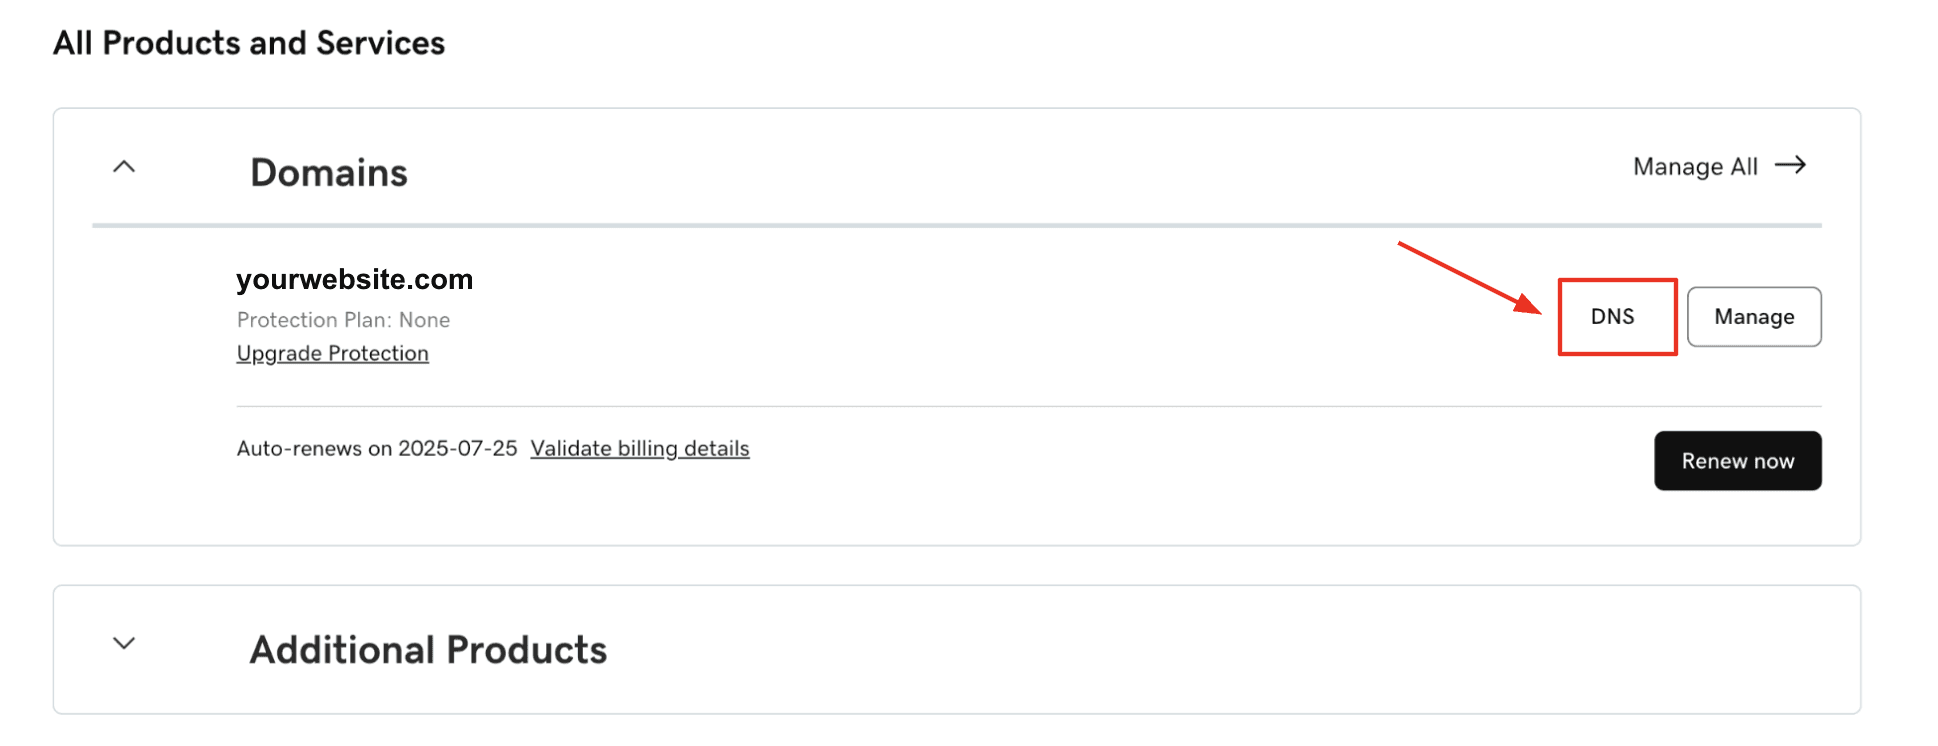
Beside your domain, click 'DNS':
Click 'Add New Record':
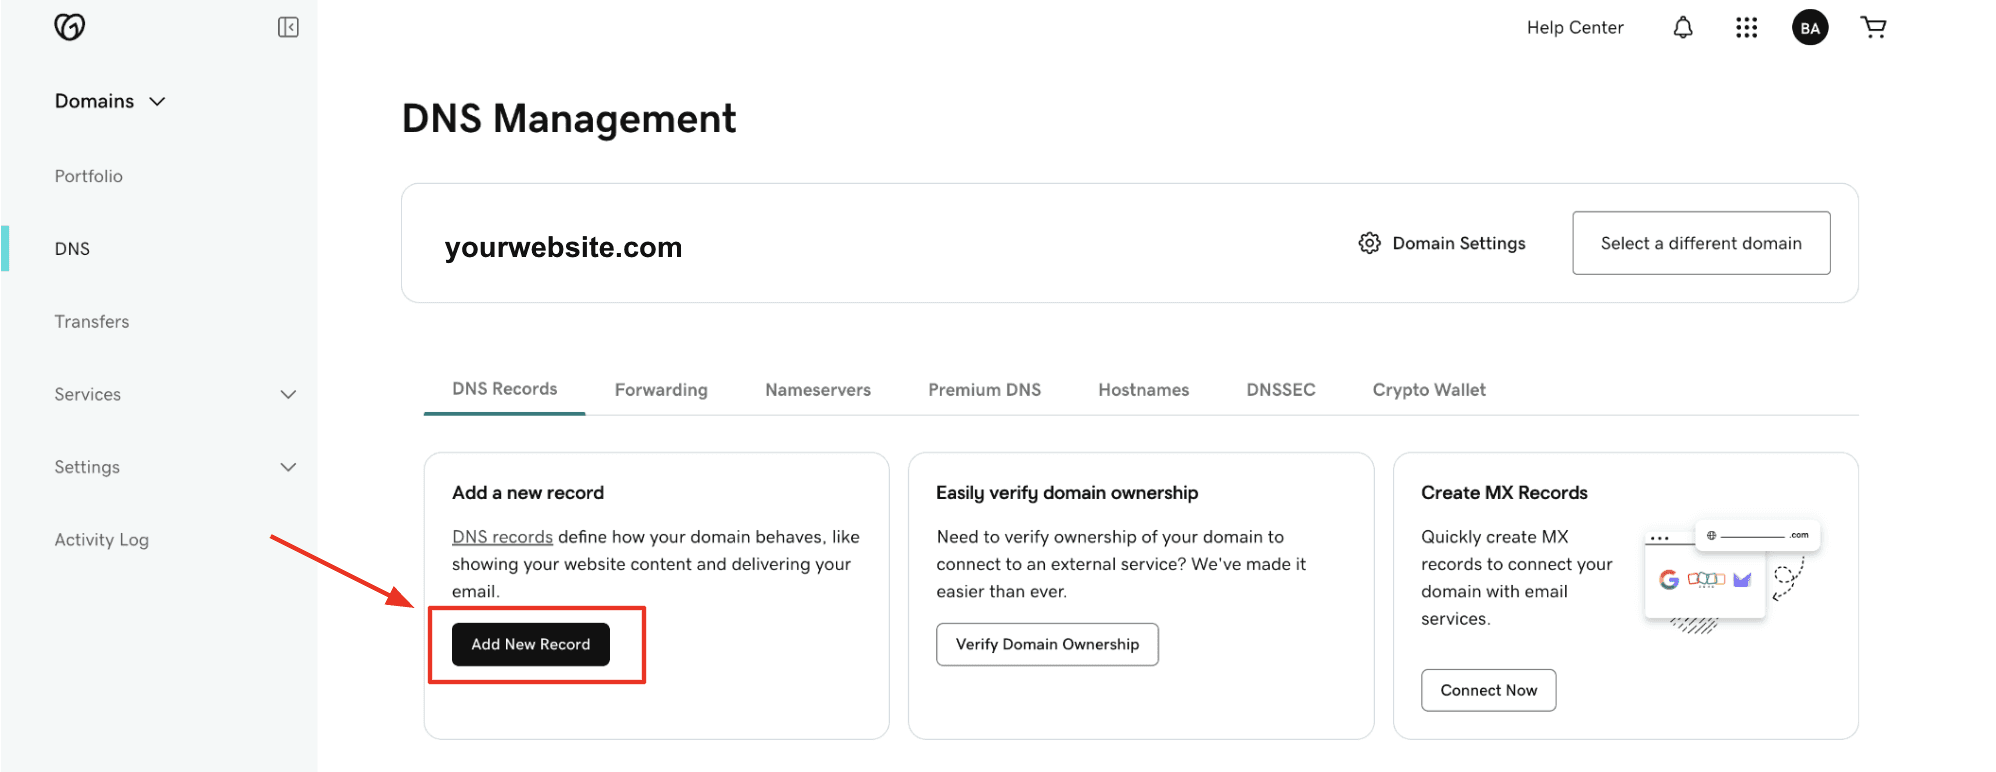
Set the following values for your new record then click 'Save':
Type = CNAME
Name = blog
Value = cname.vercel-dns.com
TTL = 1/2 Hour

Login to your Melora account here and go to your account settings:
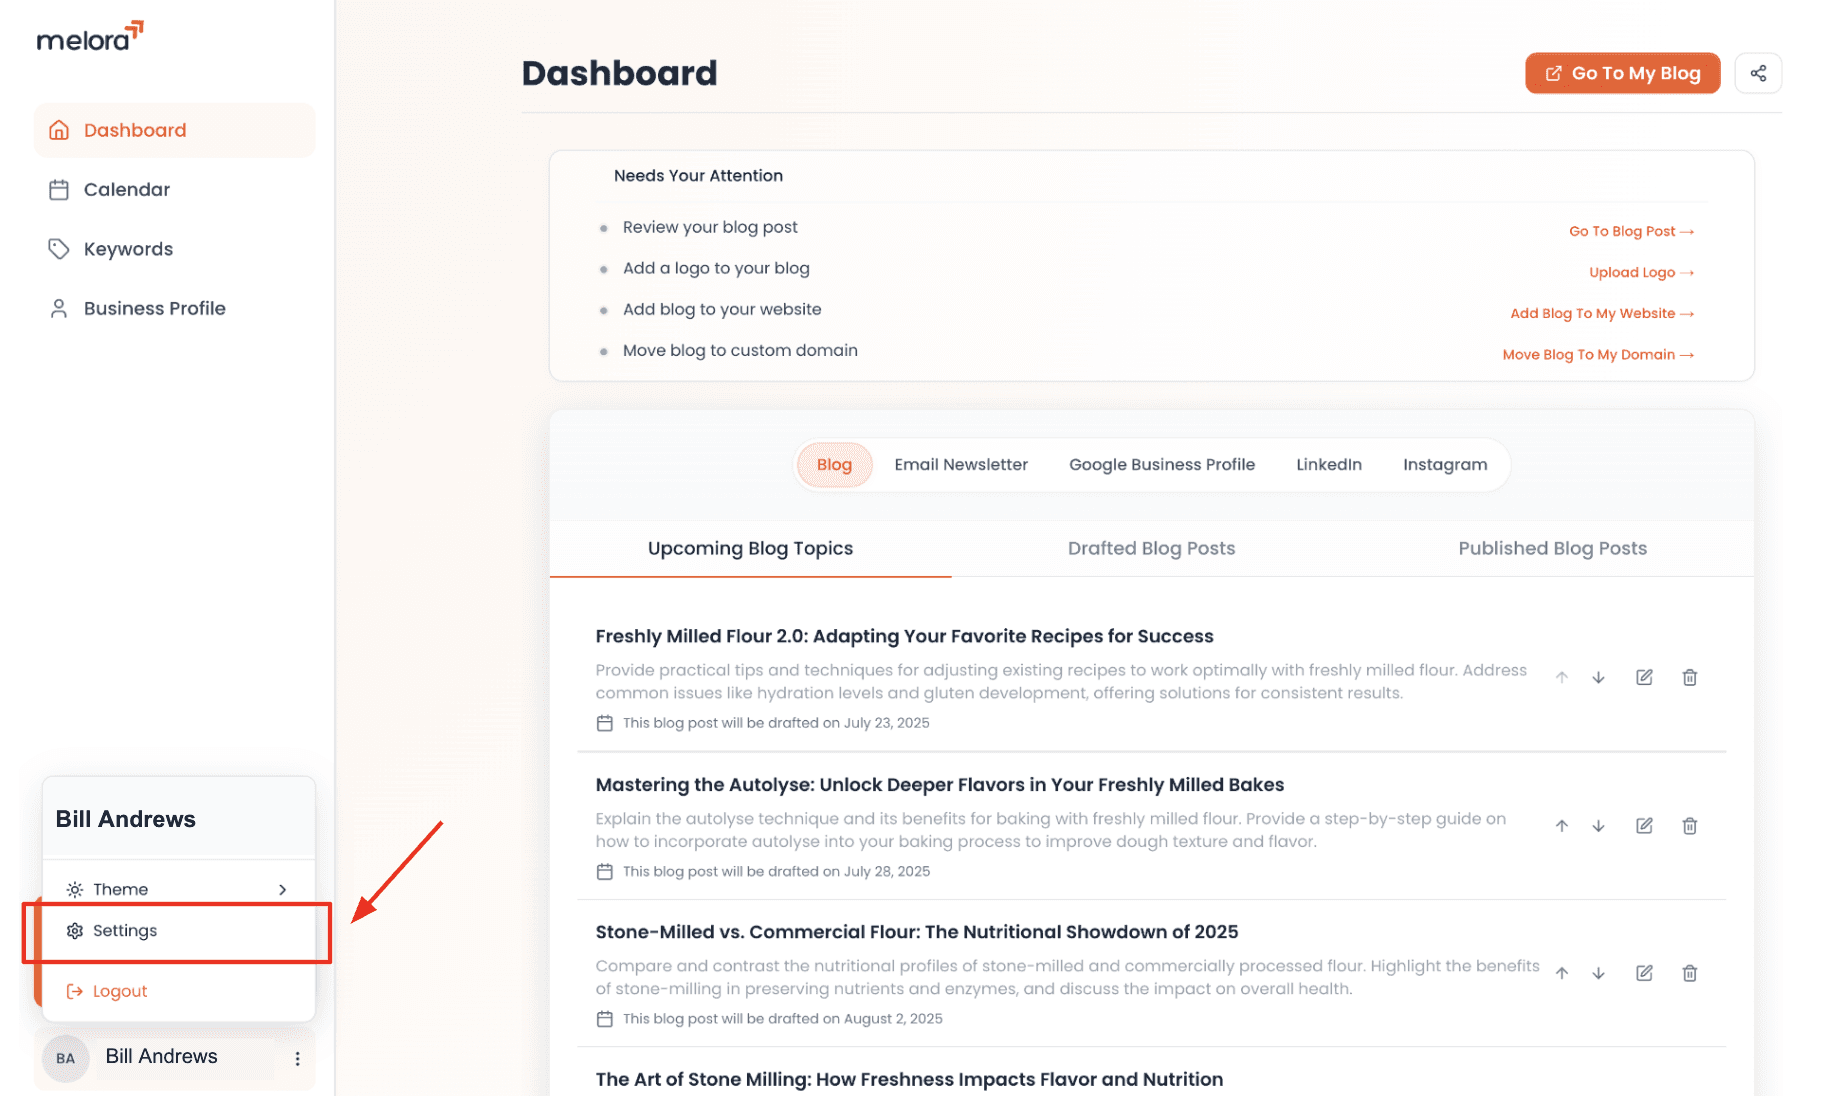
In your account settings, scroll down to the 'Custom Domain' section and click 'I've added the record':
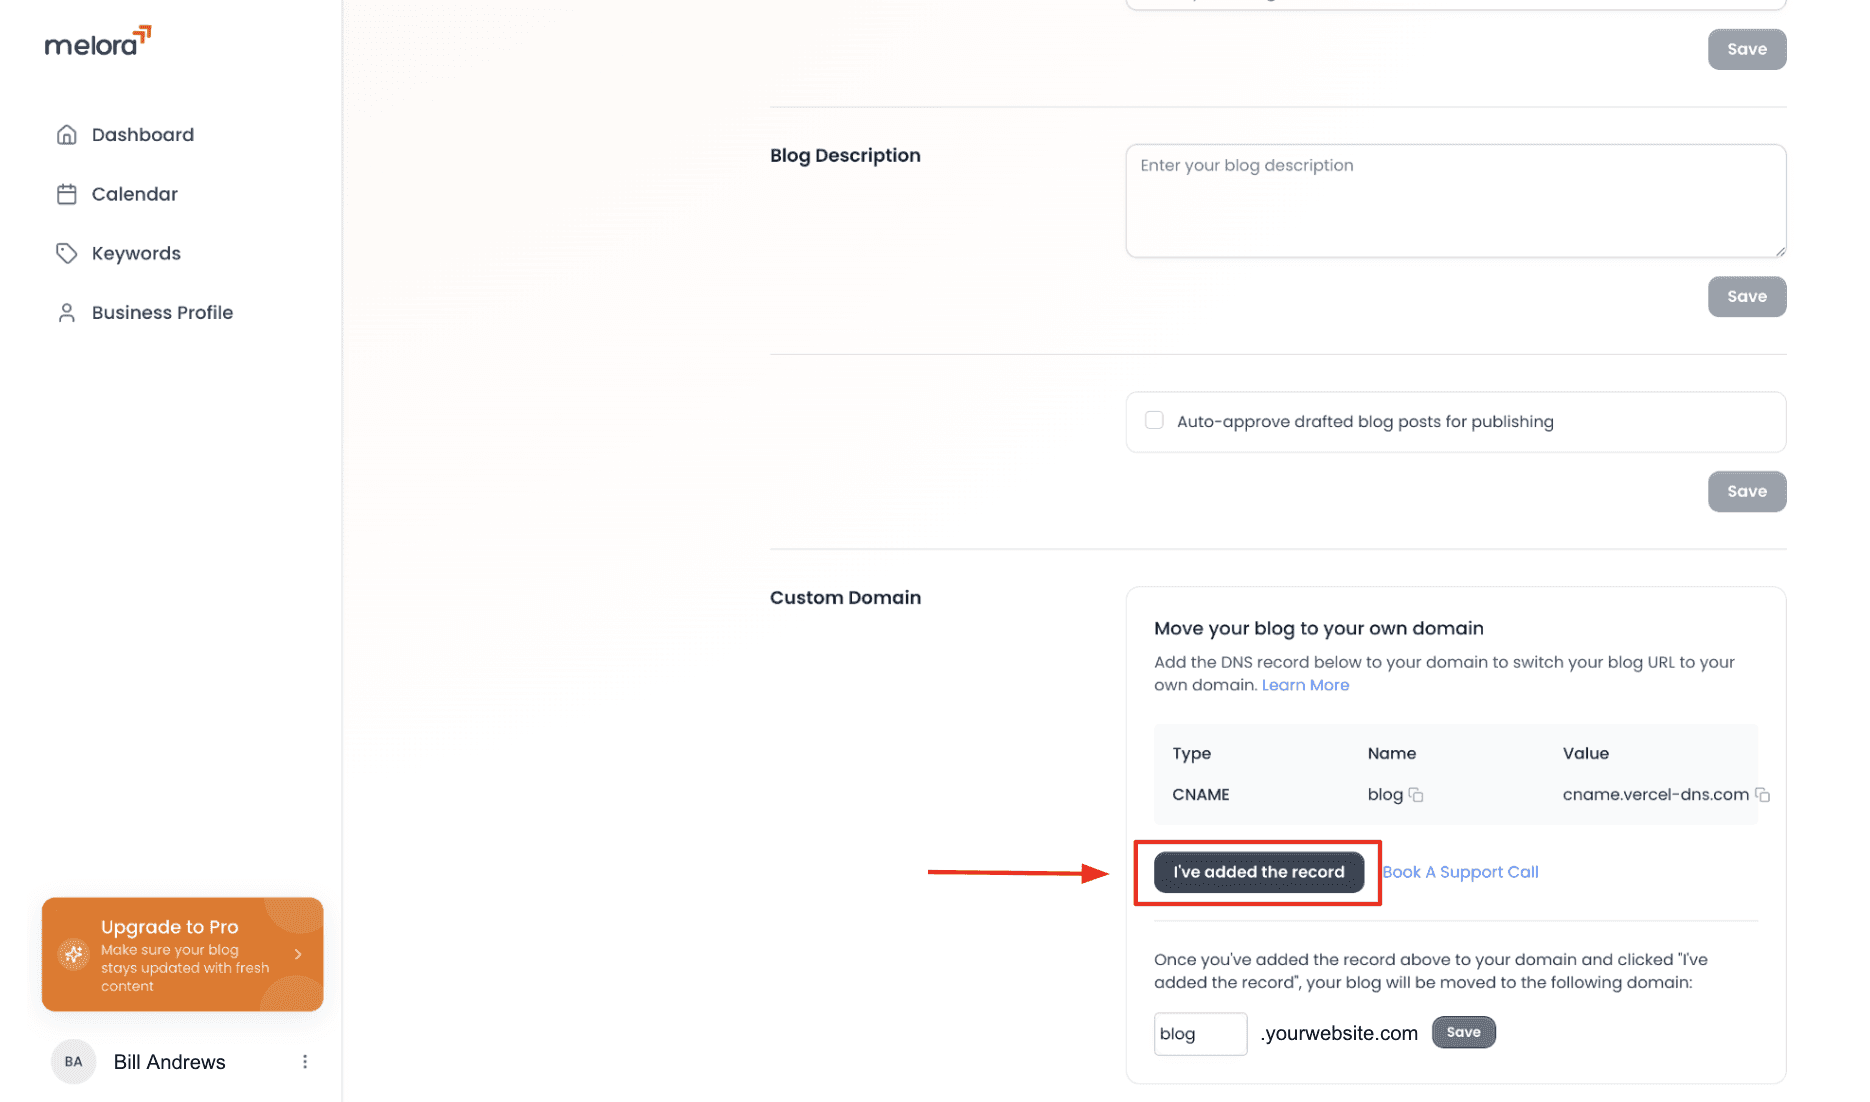
Our system will verify that your DNS record was properly added to GoDaddy, then confirm that your blog can now be accessed at blog.yourwesbite.com.
The verification should just take a couple of seconds, and once it's done you can see your blog at the new domain!
Move your blog to your own domain that is registered with Namecheap
Follow these steps to move your blog to your own domain if your domain is registered with Namecheap:
Log in to your Namecheap account here
Move your blog to a domain that is registered with Squarespace
Follow these steps to move your blog to your own domain if your domain is registered with Newfold Digital:
Log in to your Squarespace account here
Move your blog to a domain that is registered with a provider other than GoDaddy, Namecheap or Squarespace
Not using GoDaddy, Namecheap, or Newfold Digital? No problem — we’re here to help! If your domain is registered with a different provider, and you aren’t sure how to move your Melora blog to it, just get in touch with us and we’ll walk you through it.
We’ll make sure your blog is moved over to your own custom domain in no time. We look forward to hearing from you!